

Struggling to keep up with new Salesforce leads? Power Automate simplifies notifications, ensuring your team responds instantly.
When a lead enters Salesforce, delays in follow-up can cost you potential customers. Power Automate connects Salesforce with Microsoft 365 tools (like Teams and Outlook) to deliver real-time alerts and streamline your workflow. Here’s what you need to know:
- Why it matters: Traditional email alerts are often missed. Power Automate sends instant notifications through Teams or email, reducing response times.
- How it works: With a low-code interface, you can design workflows that trigger notifications for new or updated Salesforce leads. Alerts can be customized based on lead details like territory or priority.
- Setup essentials: You’ll need Salesforce API access, Microsoft 365 licenses, and Teams ready to receive alerts.
- Advanced options: Add conditional logic to prioritize high-value leads or integrate tools like nFlow for automated Teams workspaces linked to Salesforce.
This guide walks you through connecting Salesforce to Power Automate, setting up workflows, and optimizing lead notifications for faster, more efficient sales follow-ups.
Power Automate – Receive Email When Salesforce Record Created!
Setting Up Power Automate and Salesforce Integration
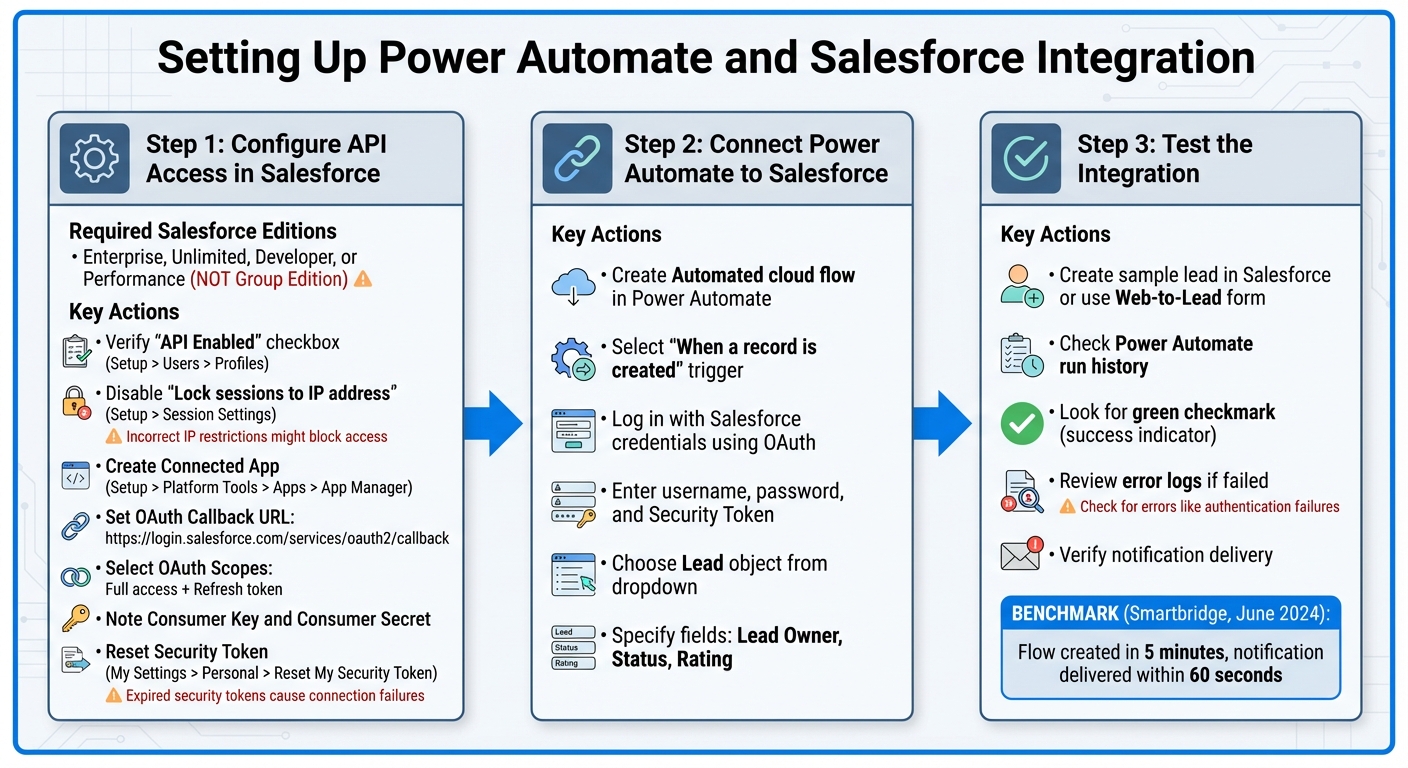
Power Automate Salesforce Integration Setup Process
Integrating Power Automate with Salesforce involves three main steps: configuring API access in Salesforce, establishing the connection in Power Automate, and testing the integration. Here’s a detailed guide to help you set it up smoothly.
Configuring API Access in Salesforce
Before Power Automate can interact with Salesforce, you need to ensure API access is enabled. This feature is available in Salesforce Enterprise, Unlimited, Developer, or Performance editions – but not in Group Edition or trial accounts. If you’re unsure about your edition, check with your Salesforce admin.
"If you are using group version, you won’t have access to APIs, which explains why it’s not working!" – Coby Press, Forum Ambassador, Cloud Orca
Start by verifying the "API Enabled" checkbox under Setup > Users > Profiles. Then, head over to Setup > Session Settings and disable "Lock sessions to the IP address from which they originated". If this setting is active, Power Automate might face connection issues.
Next, create a Connected App to provide Power Automate with secure access to your Salesforce data. Go to Setup > Platform Tools > Apps > App Manager and click New Connected App. Give your app a descriptive name, such as "Power Automate Lead Notifications." Salesforce will auto-generate the API Name, and you’ll need to add your contact email. Enable OAuth Settings, set the Callback URL to https://login.salesforce.com/services/oauth2/callback, and select "Full access (full)" and "Perform requests on your behalf at any time (refresh_token, offline_access)" under OAuth Scopes. This ensures Power Automate can maintain a persistent connection. After saving, go to Manage > OAuth Policies and select Relax IP restrictions for development environments. You can adjust this later for production environments. Be sure to note down the Consumer Key and Consumer Secret, as you’ll need these for the connection.
Finally, reset your Security Token by navigating to My Settings > Personal > Reset My Security Token. Salesforce will email you the token, which is required for password-based authentication. With these steps completed, your API access is ready, and you can move on to connecting Power Automate.
Connecting Power Automate to Salesforce
In Power Automate, select Create and choose Automated cloud flow. Give your flow a name, like "Salesforce Lead Notifications", and select the "When a record is created" trigger from the Salesforce connector. Power Automate will prompt you to log in with your Salesforce credentials. This uses OAuth to establish a secure connection.
Enter your Salesforce username, password, and the Security Token you reset earlier. If you face authentication issues, check that API access is enabled, IP restrictions are relaxed, and your credentials are correct. Common issues include expired security tokens or incorrect settings in your Connected App.
Once authenticated, Power Automate will display your Salesforce connection. Choose the Lead object from the dropdown menu to monitor new lead records. You can also specify fields like Lead Owner, Status, and Rating to include in your notifications. After confirming the connection, you’re ready to test the integration.
Testing the Integration Setup
In June 2024, Smartbridge – a Salesforce consulting partner and Microsoft Digital & App Innovation Solutions Partner – created a basic Power Automate flow in just 5 minutes to test lead notifications. The flow triggered on new Salesforce records and sent a message with a Salesforce lead link to Microsoft Teams. Within 60 seconds of creating a test lead, a Teams notification appeared, complete with push notifications on mobile devices.
To try this yourself, manually create a sample lead in Salesforce or use a Web-to-Lead form. Confirm that the lead record is saved in Salesforce with all the necessary fields populated. Next, open Power Automate and check the run history for your flow. A green checkmark next to the run indicates success. If the flow failed, click into the run details to review error logs and troubleshoot.
Common issues include incorrect trigger configurations, incomplete data retrieval, or errors in handling conditional logic. Power Automate’s execution history provides detailed error messages to help you pinpoint and resolve problems. Once your test is successful, you can move on to building more advanced notification flows.
Building Lead Notification Flows in Power Automate
Once your integration is up and running, the next step is to set up notification flows that alert your sales team as soon as a new lead comes in. Power Automate makes this easy, offering channels like email and Microsoft Teams to keep your team informed.
Creating an Email Notification Flow
Start by setting up an email alert to provide detailed lead information directly to the assigned sales rep.
To do this, add an Office 365 Outlook action to your current flow. After the Salesforce trigger activates, choose the "Send an email (V2)" action from the Outlook connector. Use dynamic content to populate the "To" field with the Lead Owner’s email from Salesforce, ensuring the notification reaches the right person. For clarity, you might use a subject line like: "New Lead: [Company Name]".
In the email body, include key lead details such as Name, Company, Phone, Email, Lead Source, and Rating. Use Salesforce dynamic content to automatically fill in these fields. To make it even easier for your sales team, include a direct link to the Salesforce lead record. Format the link as:
https://yourinstance.salesforce.com/[Lead ID]
Replace [Lead ID] with the corresponding dynamic content. This way, your team can access the lead’s full profile with just one click.
Sending Notifications to Microsoft Teams

For quicker, real-time alerts that avoid cluttering email inboxes, you can configure notifications to go directly to Microsoft Teams.
Use the "Post message in a chat or channel" action from the Microsoft Teams connector. Set "Flow bot" as the sender and "Chat with Flow bot" as the recipient. In the message body, include essential details like the lead’s name, company, and source, along with the Salesforce record link. This allows your team to access the full lead profile instantly. Plus, these notifications can trigger push alerts on mobile devices for added immediacy.
If multiple team members need the notification, use an "Apply to each" loop to send individual messages, as Teams supports only one-to-one notifications for this type of alert.
Adding Conditional Logic for Advanced Routing
Once you’ve set up basic email and Teams alerts, you can add conditional logic to prioritize and route leads based on specific attributes.
Conditional logic allows you to direct notifications based on lead details like Rating, Industry, or Territory. Add a Condition action after the Salesforce trigger to create decision branches. For example, you can ensure high-priority leads (e.g., Rating = "Hot") are sent to a dedicated Teams channel, while standard leads are routed via email.
To configure this, select Lead Rating from dynamic content, set the operator to "is equal to", and enter "Hot" as the value. In the "If yes" branch, add a Teams action to post the notification to a high-priority channel. In the "If no" branch, set up an email action for standard routing. You can also include additional conditions, such as geography or industry, to make sure each lead gets to the most appropriate sales rep.
sbb-itb-95f1422
Using nFlow to Automate Lead Workspaces
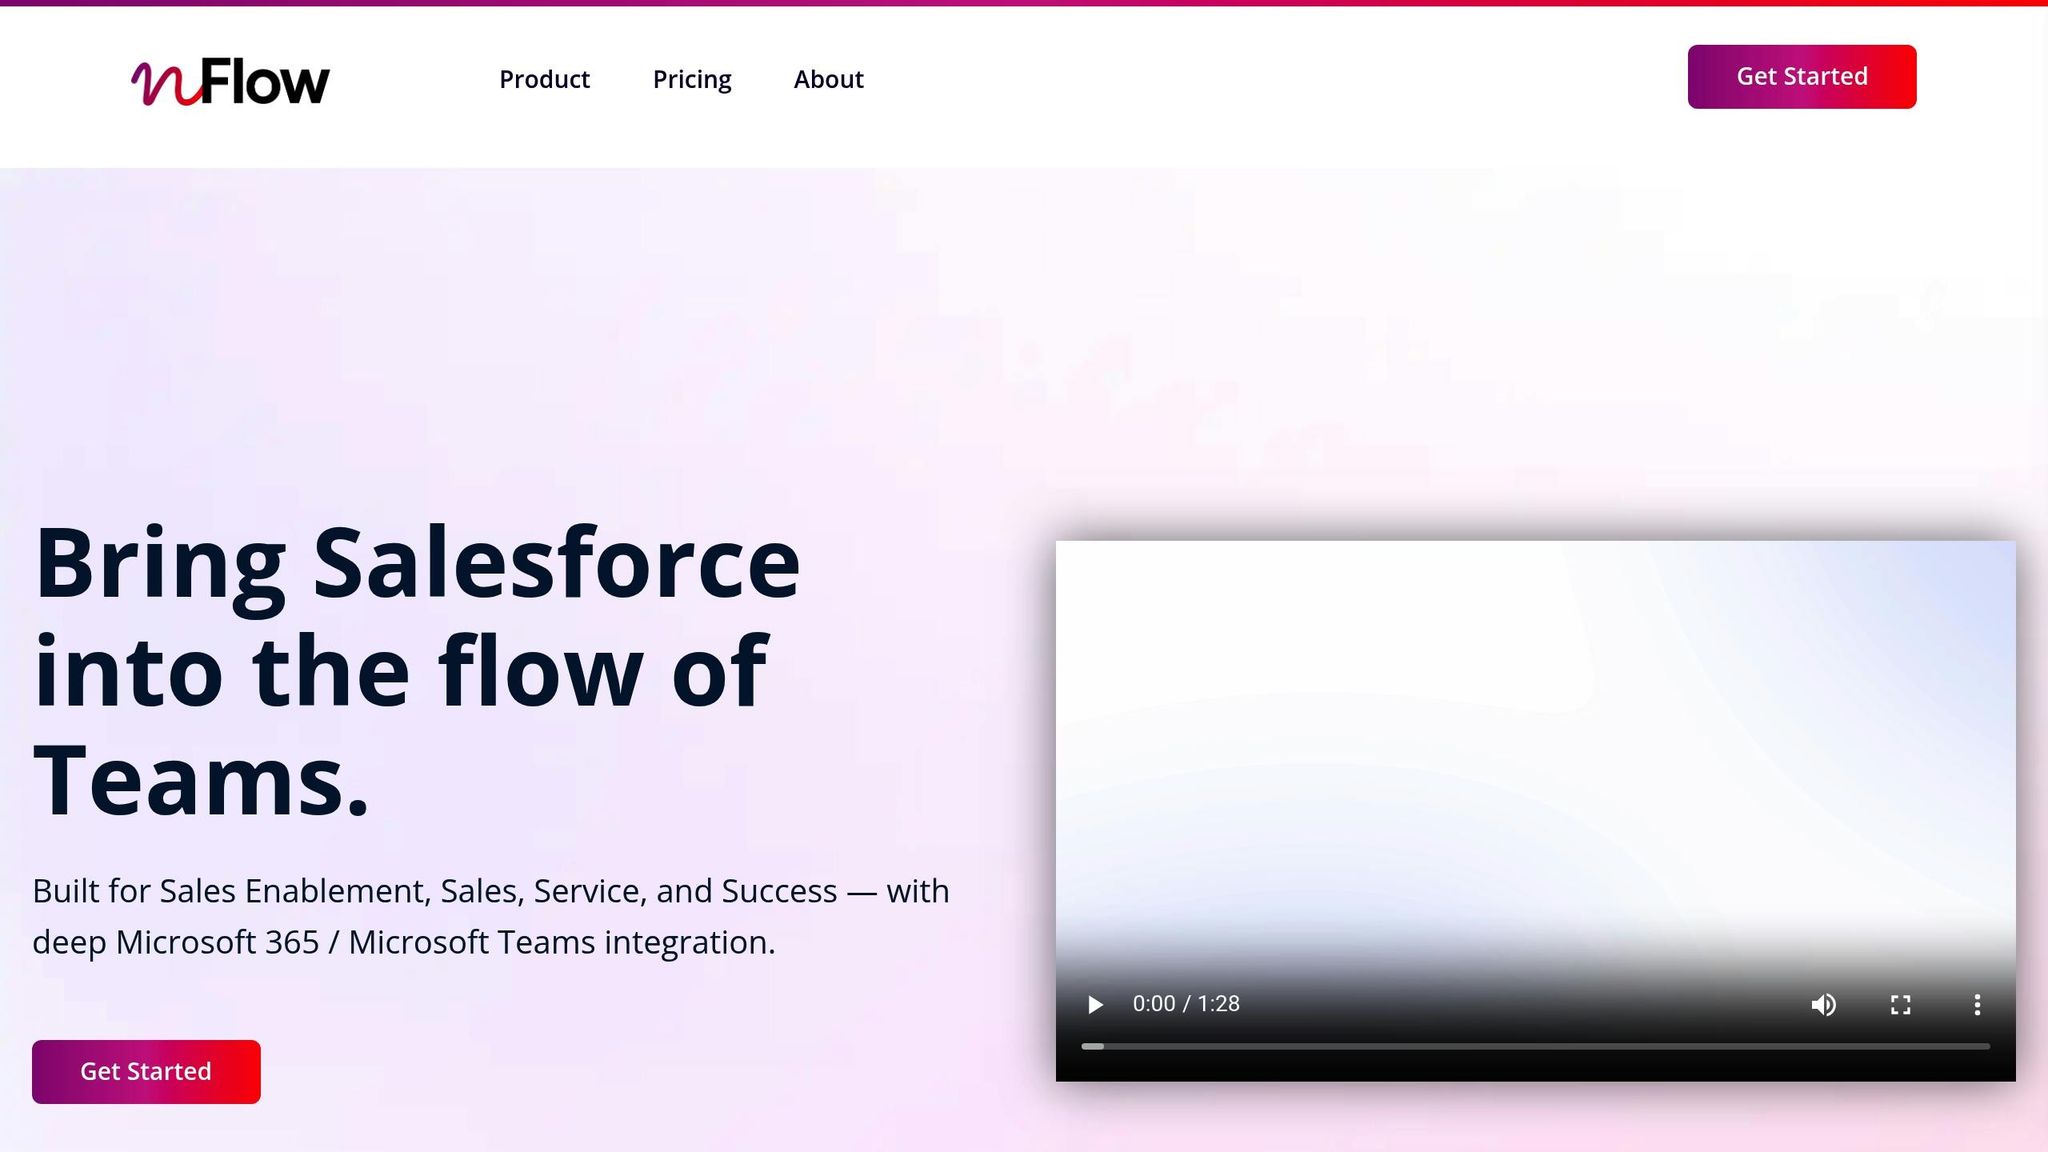
Power Automate does a great job with notifications, but nFlow takes the integration between Salesforce and Microsoft Teams to the next level. It doesn’t just send alerts – it creates full-fledged collaboration workspaces tailored to your lead follow-up process. With nFlow, your sales team gets ready-to-go Teams environments, complete with the right channels, files, tasks, and Salesforce data. This setup helps guide leads seamlessly from first contact to conversion, making collaboration more efficient and effective.
Automating Teams Workspaces for Leads
nFlow keeps an eye on your Salesforce leads and automatically sets up dedicated Teams workspaces when a lead matches your criteria. These workspaces are built using predesigned templates that include standard channels for tasks like discovery, proposals, and strategy. Plus, there are private spaces for handling sensitive discussions. With preloaded sales templates, task lists, and pre-set permissions, your team can start collaborating right away – no manual setup required.
Integrating Salesforce Context in Teams
Each Teams workspace created by nFlow includes a tab that links directly to the relevant Salesforce lead record. This integration allows sales reps to access detailed lead information, make updates, add notes, and track activity – all without leaving Teams. By eliminating the need to switch between apps, nFlow simplifies the workflow and keeps everything in one place.
Governance and Lifecycle Management
nFlow also handles the lifecycle of your lead workspaces. When Salesforce updates a lead – whether it’s converted, closed, or marked inactive – nFlow can automatically archive or delete the corresponding Teams workspace. This ensures your collaboration environment stays clean and organized. On top of that, dynamic naming conventions based on Salesforce data help maintain consistency and prevent duplication, making it easier to manage your workspaces efficiently.
Maintaining and Optimizing Lead Notification Workflows
Once you’ve established your workflows, it’s crucial to test them thoroughly to ensure lead notifications work seamlessly. Start by manually triggering these workflows in a Salesforce sandbox environment with sample lead data. Using a sandbox setup ensures your testing doesn’t disrupt live operations. Check each step of the flow to confirm that data is handled correctly and messages are delivered as expected. This approach ensures your workflows are ready to adapt to any future changes.
Tools like Power Automate’s run history and Flow Checker are invaluable for troubleshooting. The run history provides a detailed record of each workflow’s execution, while the Flow Checker highlights errors and their causes. These tools help you quickly pinpoint and resolve issues, reducing downtime and keeping your system running smoothly.
As your business evolves, your workflows need to adapt too. For example, when your sales team updates Salesforce lead assignment rules or modifies field values, you’ll need to adjust your Power Automate flows to reflect these changes. What may have started as a simple workflow might need to grow into something more advanced – like filtering notifications based on lead attributes, adhering to new assignment rules, or tracking activities on current leads and contacts. Keeping your workflows updated ensures they remain aligned with your sales strategy.
To maintain reliability, continue testing your workflows regularly. Use dummy leads that meet your notification criteria to verify everything is functioning as expected. Periodic testing with these sample leads ensures your system stays dependable, keeping your sales team informed and ready to act. Regular maintenance and testing are key to a responsive and effective notification system.
Conclusion and Key Takeaways
Key Benefits Recap
Power Automate brings a game-changing approach to handling leads by cutting down on manual tasks and speeding up response times. It ensures your sales team is always in the loop by sending instant notifications through Teams, email, and mobile push alerts. With multiple ways to notify, it keeps your team ready to act when leads are most likely to convert.
Another big win? Less time wasted switching between apps and better teamwork. Automated lead routing directs leads to the right team member based on factors like location, industry, or product interest. This ensures that qualified leads land in the hands of the right people, leading to faster conversions, fewer missed chances, and shorter sales cycles.
For teams looking to take collaboration to the next level, nFlow offers seamless integration with Salesforce playbooks, transforming them into ready-to-use Teams workspaces. Building on Power Automate workflows, nFlow takes over when a high-value lead becomes an opportunity. It sets up a deal room complete with pre-configured channels, sales templates, task lists, and even pins the Salesforce record right in the workspace. This means your sales, marketing, product, and legal teams can dive into collaboration immediately – no manual setup, no scattered files.
Next Steps
To make the most of these tools, start simple. Create a basic Power Automate flow and gradually refine it with filtering logic. Set up a quarterly review process to ensure your automations stay aligned with your sales objectives.
If your team struggles with disorganized collaboration or spends too much time manually setting up deal rooms, consider using nFlow to automate your sales playbooks. Its no-code visual builder lets your RevOps team set up workspace automation without needing custom development. Plus, lifecycle management automatically archives Teams when deals close, keeping your workspace tidy. Keep fine-tuning your workflows so your sales team can focus on what they do best – closing deals.
FAQs
How does Power Automate help ensure timely follow-ups for new leads in Salesforce?
Power Automate makes it easy to stay on top of new leads by instantly sending out notifications whenever a lead is added in Salesforce. These alerts can pop up in Microsoft Teams or land in your email inbox, helping your team jump into action quickly and avoid any delays in connecting with potential clients.
To take teamwork a step further, nFlow offers a seamless way to link Salesforce with Microsoft Teams. It automates the setup and management of Teams workspaces based on Salesforce activities, keeping workflows smooth and cutting down on the hassle of toggling between different apps.
What do I need to integrate Salesforce with Power Automate?
To connect Salesforce with Power Automate, you’ll need a few essentials: a Power Automate license, a Salesforce account with API access, and the Salesforce connector within Power Automate. Make sure you have the correct credentials to log in and authorize the connection. Also, verify that your Salesforce setup supports API integrations to avoid any hiccups.
For even smoother collaboration, you might want to explore tools like nFlow. This tool can automate the creation of workspaces and integrate Salesforce with Microsoft Teams, helping you streamline workflows and minimize the hassle of jumping between different apps.
How does nFlow improve collaboration between Salesforce and Microsoft Teams?
nFlow makes teamwork easier by linking Salesforce directly with Microsoft Teams. It automatically sets up Teams workspaces whenever specific Salesforce events occur, giving your team the tools and information they need to respond quickly to deals, cases, or customer management tasks.
With its role-based administration and a no-code workflow builder, nFlow simplifies processes, cuts down on constant app-switching, and ensures tasks are handled consistently. This keeps your team organized, speeds up response times, and boosts overall efficiency.
Leave a Reply